
Train Deep Learning models with Ikomia STUDIO
In this post, we will describe how to train well-known Deep Learning models on your data with Ikomia STUDIO. We will focus on three application fields: classification, object detection and semantic segmentation.
All plugins used in this tutorial are available in the public HUB. Source codes are also available in our GitHub repository.
Today, Deep Learning algorithms represent one of the main research fields in Computer Vision. Ikomia aims at facilitating the evaluation and sharing of Computer Vision algorithms.
Image classification is the task of identifying what an image represents. So the training process uses image datasets where the image representations are known. As a result, the classification algorithm does not need any additional annotations. As a convention, the file structure of the dataset is fixed.
We follow the PyTorch structure: a root folder with train and val sub-folders. And at the last folder level, there are as many sub-folders as the number of classes:
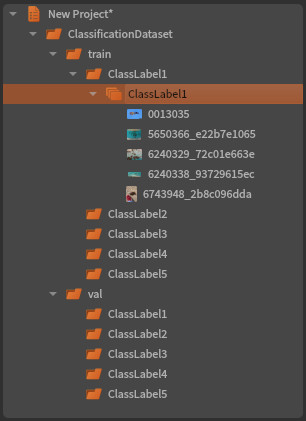
Loading such dataset in Ikomia is easy. You just have to use the ‘Open Folder’ function from the main menu. Then you have the possibility to visualize the contained images directly.
First, you have to select the Deep Learning model you want to train. If you have not installed such algorithms yet, open the Ikomia HUB and search for a classification model. Use the search bar with convenient keywords (e.g., classification, train) to find it easily. Then you are able to pick your Deep Learning model from the Ikomia process library.
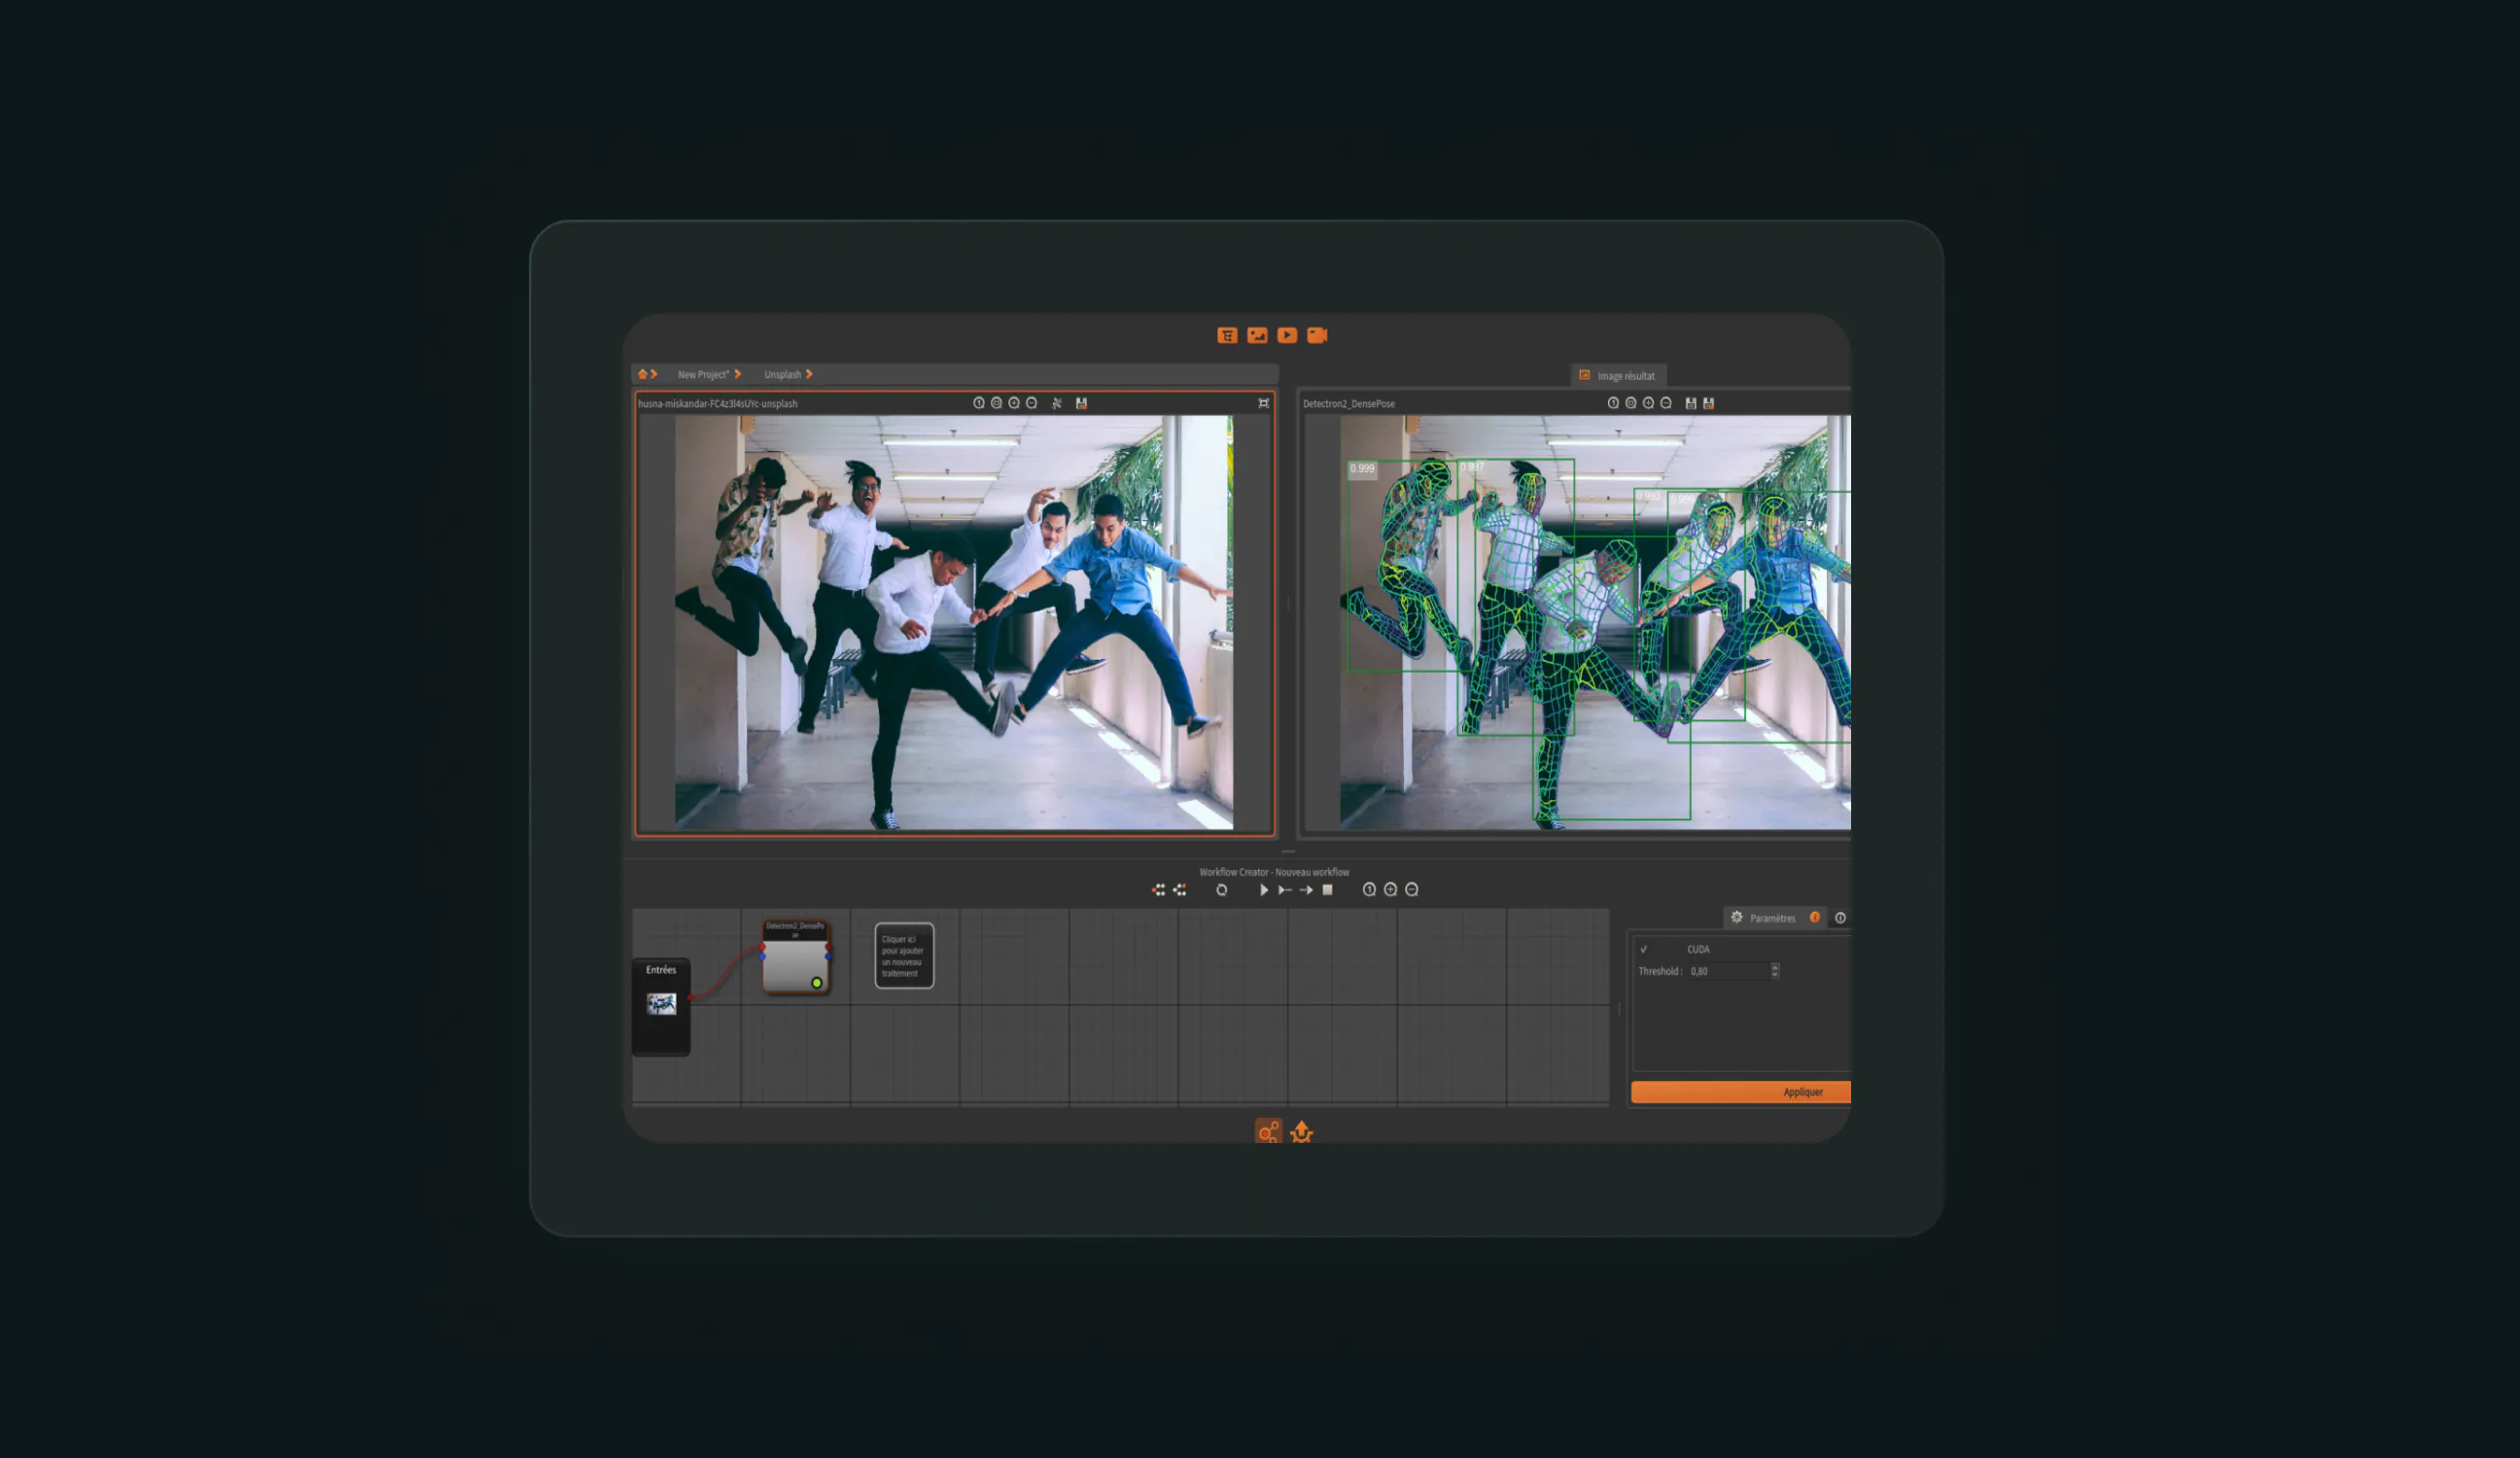
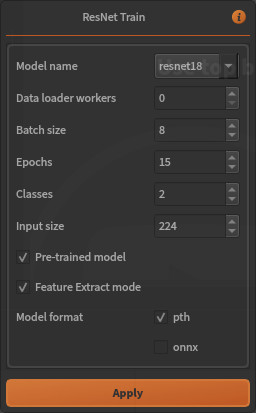
Secondly, each algorithm comes with its own set of hyper-parameters. You will need to set them up correctly in the window that pops up when you select your algorithm. Parameters can also be modified in the information area of the Workflow Creator. For example, the ResNet parameters window looks like this:
After that, you should have a new workflow containing a single node. Training algorithms for classification require a Folder data type as unique input. So what we have to do now is to set the global input of our workflow (consult this post if you are not familiar with the Workflow Creator):
Finally, connect the global input to your node, and you are ready to launch your training.

At the time of writing, the Ikomia HUB offers the following classification models:
Of course, this list will continue growing and contributions are welcome!
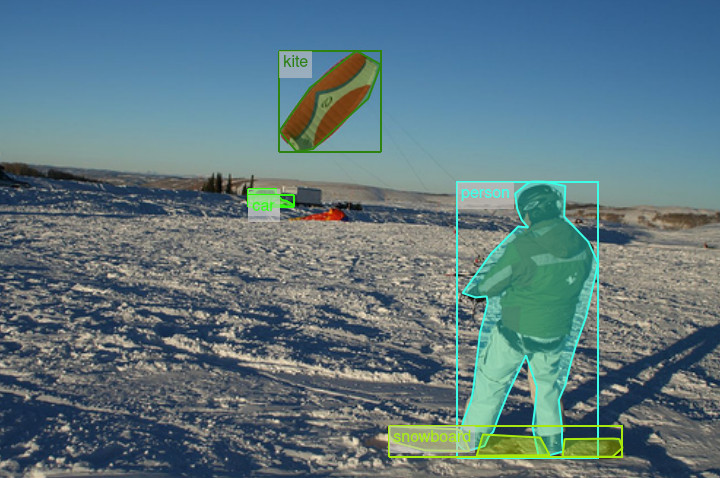
Object detection aims to find objects of certain target classes with precise localization in a given image and assign each instance a corresponding class label. The training process of such algorithms requires object annotations for each image of a dataset.
Basically, annotations for a given object consist of a bounding box (or polygon) associated with a class label. This tedious operation is handled by humans or other deep learning algorithms.
Unfortunately, there is no standard format to represent such data. Even if some reference datasets like COCO or PascalVOC has defined some popular formats, you may have to deal with many others. That’s why Ikomia has defined its own annotation format (inspired by popular frameworks like TensorFlow and PyTorch).
Then the community provides specific plugins in the HUB to load dataset from a third-party format to the Ikomia one. This system ensures that all training algorithms can be connected behind any valid dataset reader.
At the time of writing, Ikomia HUB offers the following dataset readers:
And of course, this list will continue growing and contributions are welcome!
Training object detection algorithms requires compatible datasets as input. Therefore, we need to install a suitable dataset reader from the HUB (or develop one if none exists). The dataset reader is a process node that doesn't require data to be loaded previously in Ikomia. In other words, the dataset reader is a self-input node that is functional without setting a global input for the workflow.
After executing the node, you will see the dataset image gallery (which can take a while). You can visualize the annotations of a selected image by double-clicking on it (and double-click again to go back to the gallery).
Next, you have to choose your Deep Learning model and connect it to the dataset reader. Similar to image classification, you need to set up hyper-parameters, and then you are ready to go. At the time of writing, the Ikomia HUB offers the following object detection models (more to come):
Segmentation algorithms can be divided into three categories:
In terms of datasets, we will find the same data as in the object detection field. In addition, segmentation masks (labeled images) are also provided. Ikomia manages these datasets in the same way it does for object detection. We provide algorithms in the HUB to load datasets in the Ikomia format.
The training scheme is also equivalent to object detection. So you have to create a workflow containing a dataset reader node followed by a training node for segmentation. You will find a dedicated window again to set up hyper-parameters.
Depending on Deep Learning models, you may have to consider different training modes:
Training process learns all weights from scratch. This mode requires very large dataset to achieve good accuracy. It is also very time consuming
Training process starts from a pre-trained model (trained on large dataset). It learns all weights of the network but takes much less time than training from scratch. It is often a good trade-off between training time and accuracy.
Like transfer learning, training process starts from a pre-trained model. But it does not learn all weights of the network. Instead, it keeps features from one can call the backbone and learn only the final layer weights from which we derive predictions. This mode is quiet fast and may produce sufficient accuracy.
You will find these options in the parameter windows of the algorithms, among other hyper-parameters. Basically, you have to check if you want to start with a pre-trained model and if you want to keep features from the backbone network (Feature extract mode).

MLflow is an open-source platform to manage the ML lifecycle, including experimentation, reproducibility, deployment, and a central model registry.
Training plugins from Ikomia natively integrate MLflow. Thus, starting a training will automatically open the MLflow dashboard. It is a centralized view where experiments, runs, parameters, and metrics are reported. This way, you can keep track of your model tests. Accuracy and loss curves are also available.
Currently, we manage only the logging capability of MLflow. However, we plan to provide a more complete integration in the near future. The MLflow dashboard presents the following:
This tutorial is now complete, you are ready to train Deep Learning models on your own data. Please note that the Ikomia HUB is publicly accessible and free, and we welcome all contributions. Please visit our API documentation if you plan to publish your Deep Learning algorithm.


.svg)
