
Comprehensive Guide to Mastering MMDetection (MMDet) for Object Detection
MMDetection/MMDet stands out as a premier object detection toolkit, particularly popular among Python enthusiasts. If you're new to MMDetection/MMDet, the initial journey through its documentation and setup process might seem a bit overwhelming.
This article is designed to walk you through the crucial steps, emphasizing key points and tackling common hurdles in using the MMDetection/MMDet API, which is a dedicated wrapper for object detection applications.
Additionally, we will introduce a streamlined approach to utilize the power of MMDetection/MMDet through the Ikomia API.
Get ready to enhance your object detection endeavors!
Object detection stands as a crucial and ever-evolving field. One of the latest and most notable tools in this domain is MMDetection, an open-source object detection toolbox based on PyTorch.
MMDetection is a comprehensive toolbox that provides a wide array of object detection algorithms. Developed by the Multimedia Laboratory, CUHK, it's part of the OpenMMLab project. It's designed to facilitate research and development in object detection, instance segmentation, and other related areas.
MMDetection is not just a research tool; it has practical applications in various fields:
For this section, we will navigate through the MMDetection/MMDet documentation for object detection [1]. It's advisable to review the entire setup process beforehand, as we've identified certain steps that might be tricky or simply not working.
OpenMMLab suggests specific Python and PyTorch versions for optimal results:
For this demonstration, we used a Windows setup with CUDA 11.8.
The first step in preparing your environment involves creating a Python virtual environment and installing the necessary Torch dependencies.
Creating the virtual environment
We followed the recommendation by using Python 3.8:
Once you activate the 'openmmlab' virtual environment, the next step is to install the required PyTorch dependencies.
Then we install the following dependencies:
Subsequently, we installed 'mmdet' as a dependency:
To obtain the necessary checkpoint file (.pth) and configuration file (.py) for MMDetection, use the following command:
Executing this command will download both the checkpoint and the configuration file directly into your current working directory.
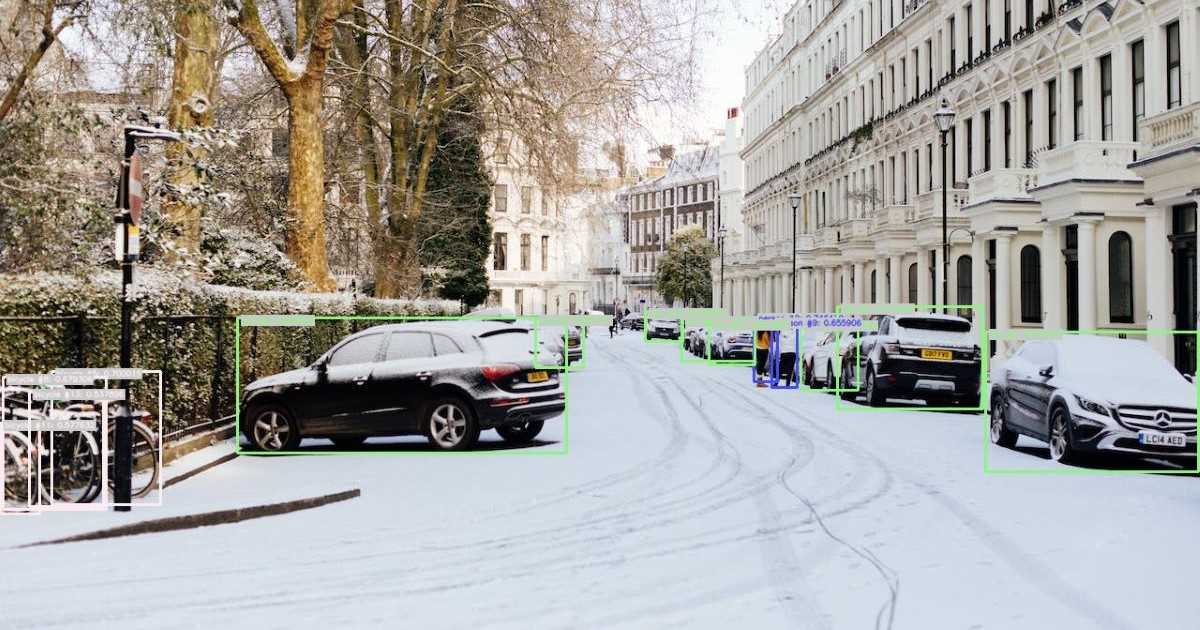
For testing our setup, we conducted an inference test using a sample image with the RTMDet model. This step is crucial to verify the effectiveness of the installation and setup.
We ran into the following problem:

Note: Upon reviewing the MMDetection GitHub issues, it was noted that this particular problem was reported in September 2023. However, as of the publication date of this article, no solution has been offered for it.
To further test the RTMDet model, we employed a Bash command for inference. The command used was:
This command is designed to perform object detection on the specified image ('demo/demo.jpg') using the RTMDet model and its corresponding weights, while running the process on the CPU. This time the inference ran successfully.
While installation steps ran smoothly, we encountered a significant hurdle: a failed inference attempt with the MMDetection API. This experience highlights the complexities and potential issues one might face while working with this object detection toolkit.
In the next section, how to use MMDetection via the Ikomia API in only 2 steps.
With the Ikomia team, we've been working on a prototyping tool to avoid and speed up tedious installation and testing phases.
We wrapped it in an open source Python API. Now we're going to explain how to use it to detect objects with MMDetection in less than 10 minutes.
As before, you need to install the API in a virtual environment. [2]
Then the only thing you need is to install is Ikomia:
You can also charge directly the open-source notebook we have prepared.

List of parameters:
- model_name (str, default="yolox"): model name.
- model_config (str, default="yolox_s_8x8_300e_coco"): name of the model configuration file.
- conf_thres (float, default=0.5): object detection confidence.
- use_custom_model (bool, default=False): flag to enable the custom train model choice.
- config_file (str, default=""): path to model config file (only if use_custom_model=True). The file is generated at the end of a custom training. Use algorithm train_mmlab_detection from Ikomia HUB to train custom model.
- model_weight_file (str, default=""): path to model weights file (.pt) (only if use_custom_model=True). The file is generated at the end of a custom training.
- cuda (bool, default=True): CUDA acceleration if True, run on CPU otherwise.
MMLab framework for object detection and instance segmentation offers a large range of models. To ease the choice of couple (model_name/model_config), you can call the function get_model_zoo() to get a list of possible values.
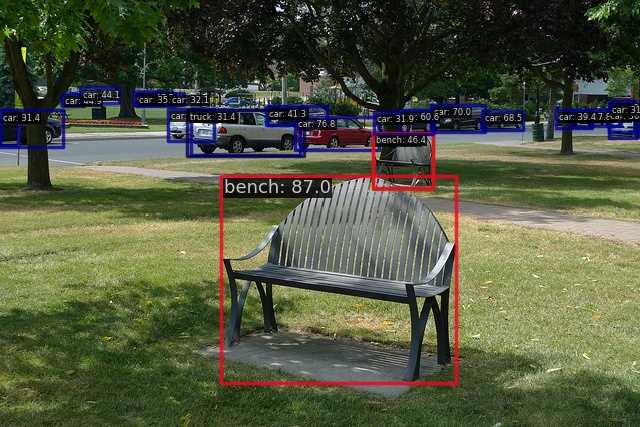
Fast MMDetection execution: from setup to results in just 8 minutes
To carry out object detection, we simply installed Ikomia and ran the workflow code snippets. All dependencies were seamlessly handled in the background.
In this guide, we have explored the process of creating a workflow for object detection with MMDetection/MMDet.
In object detection, it's often necessary to integrate various algorithms to meet specific requirements. For instance, combining object detection with tracking can significantly enhance the overall functionality.
Discover Deep Sort: The Future of Object Tracking Explained →


.svg)


